Mastering Salesforce Custom Buttons - Part 2
As promised, this is part 2 of mastering custom buttons on the long awaited heels of part 1 (you may want to read that one first since this adds onto it). Part 1 walked through what custom buttons are in general, and, how to set up a button that will create and populate a new record on another child object. Part 2 dives a little bit deeper, focusing on populating lookup fields on that new record. There are a lot of images included as this is a great way to step through the process.
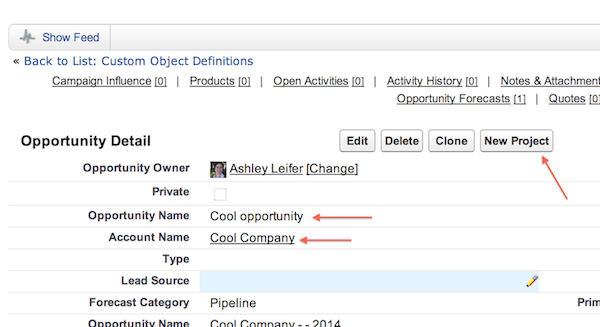
Let’s take the example from part 1 where we created a new project record from a ‘New Project’ Button located on the Opportunity object.

Part 1 showed how to generate the project name using the opportunity name. But now we want to populate both the account and opportunity lookup fields.

How do we do that you ask? We do so by following these steps…
Grabbing the ID
Go to a new project in edit mode, right click on the page, and select ‘inspect element’ (I’m using Chrome on a mac to do this). You want to get the id in the HTML code for both lookup fields and add that to the url on the button.

In Chrome, if you scroll over the elements on the page it will jump to that section in the html viewer below. The ID will also come up when you scroll over the lookup box and it will be the area in blue (including “_ilecell” for the object id’s). Interesting fact to note; if you decide to revise the page layout and move the lookup fields to a new location on the page, the IDs you are grabbing won’t be affected. They aren’t created based on layout location.


Revising The Button URL
Have two tabs open for this exercise. One tab has the inspect elements open for the project record and the other tab is the edit screen for the button. Then it’s just a matter of copying and pasting the ID’s from the HTML to the button for each lookup field needed. The object’s ID and Name fields will need to be identified using the HTML id. Your button URL will look something like this….

Always make sure to test out the button a few times after saving to ensuring you have the button url correct.
This is a great way to speed up the process when creating new records that have a lot of lookup fields pulling from a parent object. It’s a bit of a time saver which is what everyone wants, right?
Please feel free to comment below, on our Facebook page, or directly at me on Twitter @LeiferAshley.
